How do I create custom user roles and configure detailed operational permissions for custom roles
Custom User Roles allow you to create specific sets of permissions for your team members, ensuring that each user has access only to the information and functions necessary for their job. This provides greater security and operational efficiency for your property management business.
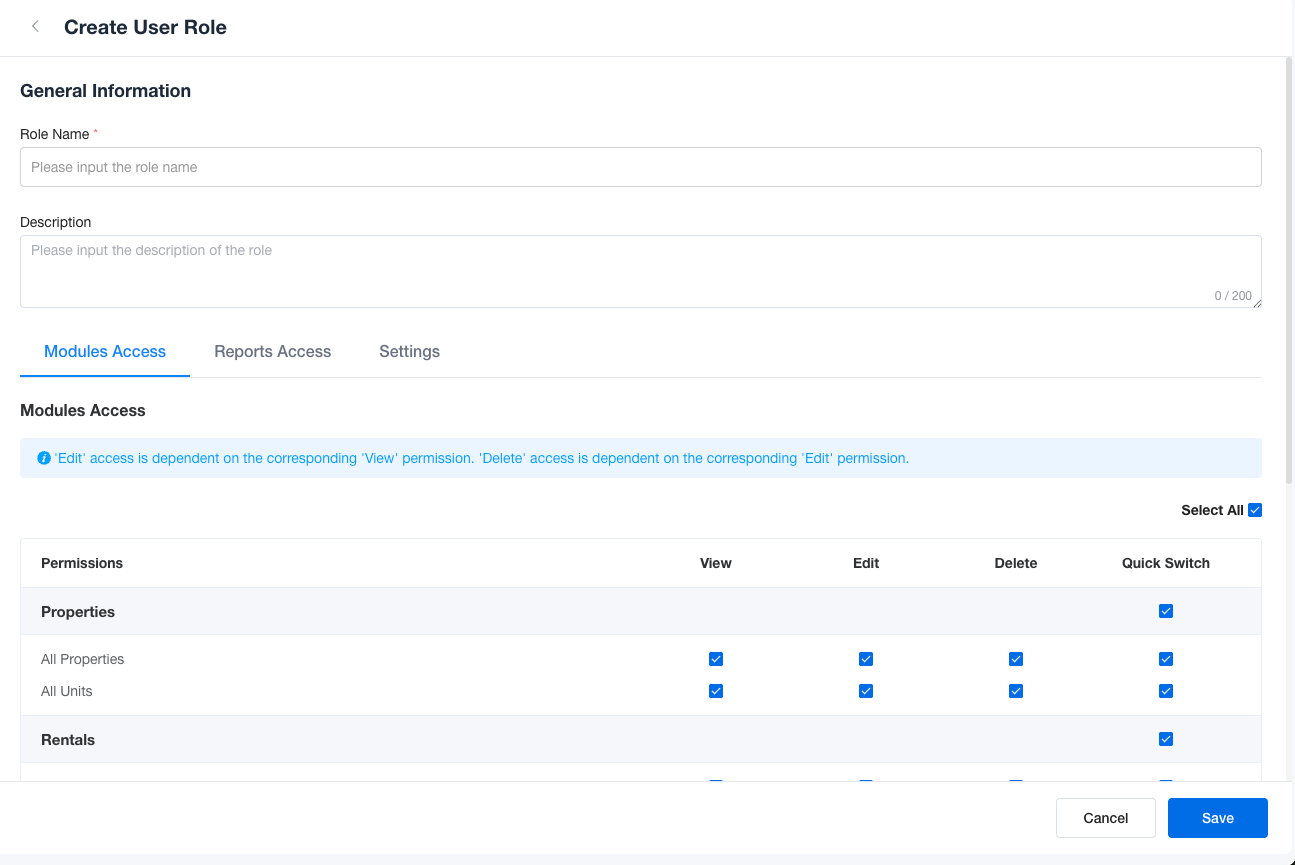
Creating a New Custom Role. Follow these steps to create and configure a new user role from scratch.
Path
Go to Account Settings > Users Roles and click the New User Role button.
Define Role Name and Description
First, you need to provide the basic details for the new role.
- Role Name: Give the role a clear and descriptive name (e.g., "Finance Manager" or "Property Manager").
- Description: Briefly explain the purpose of this role. This helps you and other administrators understand its function later on.
Configure Permissions
After defining the role's name and description, you will configure its specific permissions across three main areas: Modules Access, Reports Access, and Settings.
(1) Modules Access
This section controls the user's access to the main business modules of the platform, such as Properties, Rentals, and Financials. Permissions are set for both primary and secondary menu items. The levels of access are:
- View: The user can see the data within the module.
- Edit: The user can view and modify data, but cannot delete it. (Requires "View" permission).
- Delete: The user has full control to view, edit, and delete data. (This is the highest level and requires "Edit" permission).
- No Access: If no permissions are granted, the module will not be visible to the user.
(2) Reports Access
This tab determines which reports the user is allowed to view.
- Access: Simply check the box next to each report you want the user to be able to see. If a report is unchecked, it will be hidden from the user.
(3) Settings
This section manages permissions for account-wide configurations. The access levels are:
- View: The user can see the current settings but cannot make any changes.
- Edit: The user can both view and modify the settings. (This is the highest level).
- No Access: If no permissions are granted, the configuration section will be hidden.
Once you have configured all the necessary permissions, click Save. The new role will now be available to be assigned to any user on your team, granting them the precise access rights you have defined.
No comments to display
No comments to display